Departing a hotel room or short-term vacation rental during an early morning rush is one of the most common moments to misplace high-value possessions. Phone chargers plugged behind bedside headboards, jewelry left on bathroom ledges, passports tucked into safe corners, and essential medications in mini-fridges are frequently forgotten as travelers scramble to catch morning flights or check out on schedule.
Recovering these items after you leave is neither guaranteed nor inexpensive. Examining hospitality policies reveals that returning forgotten belongings creates substantial friction for both guests and properties, making prevention far more reliable than recovery.

The True Costs of Leaving Items Behind
Many travelers assume that retrieving a forgotten jacket or tablet is as simple as asking the front desk to pop it in the mail. In practice, retrieving belongings involves rigid logistics, guest-funded shipping fees, and strict privacy protocols.
Universal Guest-Borne Expenses
Neither major hotel conglomerates nor independent vacation rental hosts absorb return postage. Major hospitality systems route recovery claims through automated portals such as Chargerback or ILeftMyStuff. These platforms assign digital tracking numbers and generate automated payment requests where guests pay full courier rates (such as FedEx or UPS) along with local handling fees before staff dispatch the parcel.
Similarly, when departing an Airbnb stay, guests must coordinate directly with the individual host through platform messaging and transfer reimbursement funds for shipping directly via the Airbnb Resolution Center.
Mandatory Destruction of Sensitive Items
For security and data-privacy reasons, hotels do not hold or return every item indefinitely. For instance, Marriott corporate lost-and-found policies dictate that unclaimed credit cards are not kept in storage; staff immediately report them as lost to the issuing financial institution and destroy them securely. Prescription medications and perishables are also subject to disposal rather than courier return due to health and safety regulations.
Limited Holding Windows
Unclaimed items at large hotel properties are typically held in property logs for 30 to 180 days depending on perceived value before being discarded, liquidated, or donated. Vacation rentals have even fewer legal retention obligations, meaning property turnovers can lead to discarded items within hours. Establishing a repeatable departure workflow prevents these operational headaches entirely.
The Three-Phase Departure Workflow
A reliable departure system eliminates the chaotic scramble ten minutes before check-out. By dividing your departure process into three distinct phases—the evening before, the morning zone sweep, and the threshold check—you systematically clear high-risk areas.

+------------------------------------------------------------------+
|                   THE DEPARTURE WORKFLOW                         |
+------------------------------------------------------------------+
|  PHASE 1: NIGHT-BEFORE STAGING                                   |
|  - Consolidate cables into one charging station                  |
|  - Pack primary wardrobe and hanging garments                    |
|  - Empty safe interior; leave safe door wide open                |
+------------------------------------------------------------------+
                                 |
                                 v
+------------------------------------------------------------------+
|  PHASE 2: MORNING ZONE SWEEP (CLOCKWISE)                         |
|  - Zone 1: Bedding peel & under-frame scan                       |
|  - Zone 2: Outlets, nightstands, and headboard crevices          |
|  - Zone 3: Bathroom ledges, hooks, and shower stalls             |
|  - Zone 4: In-room safe, mini-fridge, and closets                |
+------------------------------------------------------------------+
                                 |
                                 v
+------------------------------------------------------------------+
|  PHASE 3: THRESHOLD PHYSICAL TOUCH VERIFICATION                 |
|  - Touch phone, wallet, passport/ID, keys, boarding passes       |
|  - Confirm luggage exterior pockets are fully zipped             |
|  - Complete keycard drop / lockbox sequence                      |
+------------------------------------------------------------------+
Phase 1: Night-Before Staging
The majority of forgotten belongings stem from fatigue during morning departures. Completing 80% of your packing the night before dramatically reduces cognitive load.
- Establish a Central Launchpad: Choose an elevated, obvious surface—such as the main luggage rack or a cleared desk—where packed bags and daily essentials reside. Avoid using the floor or soft armchairs where small items blend into upholstery.
- Consolidate Electronics and Cables: Unplug every wall adapter, USB cord, and auxiliary charger scattered across the room. Reconnect only the devices requiring overnight power into a single, high-visibility outlet on top of the desk rather than behind the bed.
- Clear the Wardrobe and Safe: Remove hanging clothes from closet racks and unpack the safe. Place your passport, extra cards, and secondary electronics directly into your primary travel bag that night. Leave the safe door hanging wide open. A closed safe door creates an illusion that it has already been checked.
- Pack Toiletries Down to Essentials: Return electric razors, specialty cosmetic bottles, and extra medicines to your dopp kit, leaving only a toothbrush and face wash out for morning use.
Phase 2: Morning Room-by-Zone Sweep
On departure morning, do not scan the room with a casual glance from the doorway. Optical illusions caused by room lighting, deep carpeting, and dark furniture hide items easily. Instead, conduct an active, physical sweep through four distinct zones:
Zone 1: The Sleeping Area
- The Duvet Peel: Strip back the duvet, top sheet, and pillowcases toward the foot of the mattress. Small items like wireless earbuds, sleep masks, smartphones, and jewelry frequently slip between the mattress and the headboard during the night.
- Under-Bed Flashlight Scan: Turn on your smartphone flashlight and look completely under the bed frame. Do not assume nothing rolled underneath; shoes, charging bricks, and dropped documents often slide into shadowed recesses.
Zone 2: Workstations and Outlets
- Behind Furniture Inspection: Check wall outlets behind side tables, work desks, and sofa corners. Power bricks matching the room's baseboard color are easily overlooked.
- Desk Drawers: Open every desk drawer fully, even if you do not recall placing items inside.
Zone 3: The Bathroom
- Shower Ledge & Door Hooks: Look inside the shower stall for personal body washes, razors, or loofahs sitting on high corner shelves. Check the back of the bathroom door for hanging toiletry organizers, bathrobes, or damp workout clothes.
- Medicine Cabinet & Vanity: Inspect vanity drawers and behind cosmetic mirrors where rings, watches, or contact lens cases are placed out of splash zones.
Zone 4: Kitchenette & Climate Areas
- Refrigeration Units: Check the mini-fridge and freezer for opened wine, perishable snacks, or temperature-sensitive medications (like insulin). Ensure you haven't confused personal beverages with minibar inventory.
- Closet Shelving: Run your hand along the top shelf of the closet, where hats, extra tote bags, or umbrellas tend to settle.
Phase 3: The Final Threshold Verification
Never step outside the accommodation door until you execute a hands-on physical touch test. A visual glance is insufficient because the brain often confirms an item's presence based on expectation rather than reality.
- The Physical Touch Routine: Place your hand directly on your pocket or personal bag to physically confirm five vital items:
- Government ID or Passport
- Primary payment card and physical cash
- Smartphone
- House and vehicle keys for your return home
- Accommodation room keys or rental access fob
- Lockbox & Exit Closure: In a vacation rental, verify that windows are latched, thermostats are adjusted to host preferences, and entrance keys are placed securely into the assigned lockbox before driving away.
Worked Example: A 15-Minute Hotel Departure Routine
To see how this works during an actual trip, consider this sample timeline for an 08:00 check-out window:

| Time | Location | Action | Verification |
|---|---|---|---|
| 07:30 | Bathroom | Pack remaining morning toiletries into travel kit | Countertop and shower ledges completely bare |
| 07:35 | Bed & Nightstand | Pull back bed linens; pack overnight phone cable | Nightstand drawer open and empty; bed stripped |
| 07:40 | Desk & Mini-Fridge | Remove snacks/medication from fridge; pack laptop | Mini-fridge door left ajar; all wall outlets clear |
| 07:45 | Closet & Safe | Final inspection of hangers and safe interior | Safe door open at 90-degree angle; closet racks empty |
| 07:50 | Entry Threshold | Execute five-point touch test (Passport, Phone, Wallet, Keys, Keycard) | Luggage zipped; personal item sealed |
What to Do If You Leave Something Behind
Even with disciplined habits, unforeseen distractions happen. If you discover an item is missing after departing, act immediately to maximize recovery odds:
- Call the Property Directly: Contact the local front desk immediately rather than a central reservations line. According to hotel operators like Hilton, on-site housekeeping teams manage lost-and-found intake locally. Reaching the front desk before the room is reassigned to the next guest significantly improves your odds.
- Provide Precise Details: When logging an inquiry with platforms like Chargerback or property teams, provide the exact room number, check-out date, precise item description (brand, color, identifying marks), and the exact location where you suspect it was left.
- Expect Digital Billing: Prepare to approve digital shipping invoices for courier transit. Keep your tracking number handy until delivery is verified.
Keeping Travel Documentation Organized
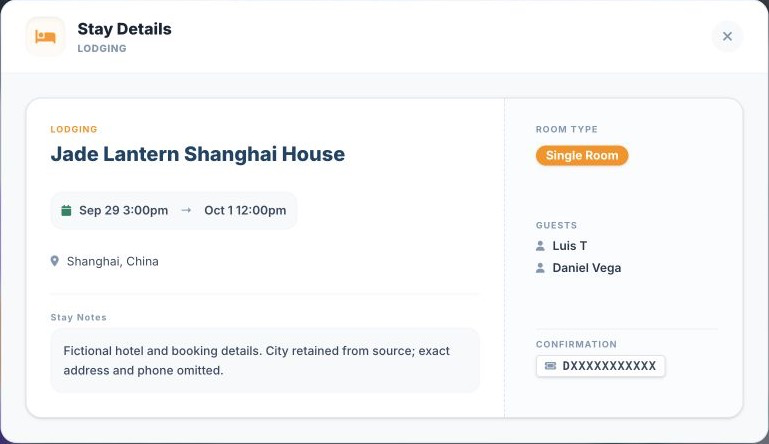
A smooth departure relies on having fast access to property addresses, check-out instructions, and host contact numbers when you need them most. Travelers managing multi-city itineraries can use Suitcase2Go to keep accommodation details, reservation confirmations, and daily planning schedules structured in one central place. Having clear departure times and property contacts easily accessible ensures your check-out day remains calm, organized, and error-free.