
Traveling overseas with food allergies, celiac disease, or strict dietary requirements requires an intentional planning workflow. A casual phrase translated on the fly through a mobile app can lead to miscommunications, cross-contact exposure, or a medical emergency in an unfamiliar healthcare setting. Beyond communication at dining tables, travelers must manage airport security screening policies, flight meal risks, and documentation for foreign customs authorities.
Building a systematic prep plan 4 to 6 weeks before departure eliminates guesswork. By creating dual-format translation cards, centralizing medical paperwork, and establishing dining verification routines, you can navigate international food environments confidently.

Step 1: Secure Medical Supplies and Border Documentation (4–6 Weeks Out)
Before drafting restaurant cards, prepare your medical supplies and prescription paperwork. According to the CDC Yellow Book guidance for severely allergic travelers, travelers at risk of anaphylaxis should schedule a consultation four to six weeks prior to departure to review an emergency action plan and refill prescriptions.
More than half of the world's countries—predominantly across parts of Africa, Central America, South America, and Asia—do not have widely available supplies of commercial auto-injectable epinephrine. Ensuring self-sufficiency for your entire itinerary requires proactive planning:
- Obtain Redundant Prescriptions: Pack at least two unexpired epinephrine auto-injectors per person, ideally splitting them across separate carry-on bags in case one bag is misplaced.
- Physician Travel Letter: Request a signed, dated letter from your allergist or primary care provider. The letter should list the traveler’s full legal name (matching the passport), date of birth, diagnosed allergies, required medications (including generic pharmacological names like epinephrine, not just brand names), and an explicit note stating that auto-injectors, needles, and antihistamines must remain with the traveler at all times.
- Preserve Original Packaging: Keep all emergency medications in their original pharmacy boxes with intact prescription labels matching your passport name to satisfy foreign border control and customs inspections.
Step 2: Build Multi-Language Chef and Allergy Cards
A generic "I am allergic to nuts" phrase rarely communicates the clinical reality of food allergies, nor does it address cross-contact with cookware, cutting boards, or shared oils. Professional translation cards—often called "chef cards"—bridge this communication gap.

Card Construction Checklist
A dependable allergy card should include five clear components in both English and the official written language of your destination:
- A Direct Urgency Statement: E.g., "I have a severe, life-threatening food allergy."
- Explicit Allergen Names: State primary food names, sub-varieties, and regional naming conventions (for example, clarifying arachide vs. cacahuète for peanuts in French-speaking regions, or listing tree nuts individually such as walnut, cashew, and pine nut).
- Derivative Ingredients and Hidden Sources: Mention secondary forms, including broth, stock, animal fats, oyster sauce, fish sauce, paste, or unrefined pressed oils.
- Cross-Contact Guidelines: State clearly that knives, grills, woks, pans, and cutting boards must be washed thoroughly or sanitized before preparing the meal.
- A Polite Action Prompt: E.g., "If you cannot guarantee that this meal can be prepared without these ingredients or cross-contact, please tell me. I will eat safely elsewhere."
Reputable Card Templates
Rather than relying on unvetted machine translation tools, use standardized medical translation templates. The Food Allergy Research & Education (FARE) food allergy chef cards offer free, downloadable interactive PDFs formatted in English and 10 foreign languages, including Chinese (Simplified and Traditional), Dutch, French, German, Italian, Japanese, Portuguese, Spanish, and Swedish. For languages outside these templates, consult a native speaker or certified professional translator to verify dialect nuances before laminating.
Worked Translation Card Layout (Wallet-Sized Front & Back):
+--------------------------------------------------------------+
| FRONT (Destination Language):                                |
| [Icon: Universal Prohibition / Skull / Medical Cross]        |
| ATTENTION LE CHEF / AU SERVEUR:                              |
| J'ai une allergie alimentaire grave et mortelle.             |
| Aucun(e): Cacahuètes, arachides, huile d'arachide.           |
| Veuillez utiliser des ustensiles et poêles propres.          |
| Si impossible, prévenez-moi s'il vous plaît.                 |
+--------------------------------------------------------------+
| BACK (English Reference & Emergency Contact):                |
| Severe life-threatening Peanut Allergy.                      |
| Emergency Drug: Epinephrine auto-injector in front pocket.   |
| Local Emergency Number: 112 (Europe) / Contact: +1-xxx-xxx   |
+--------------------------------------------------------------+
Formatting and Physical Production
- Print and Laminate: Print at least four physical copies per country on heavy cardstock. Laminate them with heat-seal pouches or waterproof self-adhesive film so sauces, grease, and water do not smudge the text when handled by kitchen staff.
- Distribute Copies: Keep one card in your primary wallet, one in your phone case pocket, one inside your day pack's medical pouch, and one with a travel companion.
- Create Digital Lock Screen Backups: Save a high-resolution image of the translated card to your mobile phone's photo library, and set it as your lock screen wallpaper during travel days for immediate offline access without unlocking your phone.
Step 3: Organize Transit Days, Security, and Flights
Airport security and in-flight catering represent two distinct operational checkpoints that require specific protocols.
Navigating Airport Checkpoints
Under the official TSA screening policy for EpiPens and medical liquids, epinephrine auto-injectors and medically necessary liquids are permitted in carry-on luggage and are exempt from standard 3.4-ounce (100 mL) liquid restrictions in reasonable quantities.
- Declaration: Before checkpoint screening begins, inform the security officer that you are carrying medically necessary auto-injectors and oversized liquid medications.
- Accessible Storage: Keep your auto-injectors in an exterior zippered pocket or dedicated transparent travel pouch so you can remove them quickly for physical inspection or explosive trace detection if requested.
- Temperature Stability: Never pack epinephrine in checked baggage. Unheated aircraft cargo holds can subject luggage to sub-freezing temperatures, which can damage the medication's molecular stability.
Managing In-Flight Meals and Seating
Major commercial carriers outline specific accommodation protocols. For example, Delta Air Lines allergy and dietary policies allow passengers to alert gate agents to board early and wipe down their seating area. As highlighted by the Food Allergy & Anaphylaxis Connection Team (FAACT), personal sanitizing wipes should be used on seatbelts, tray tables, and armrests, as standard alcohol hand sanitizers do not dissolve food proteins.
Be aware that standard airline Special Meals (such as GFML for gluten-free or VGML for vegan) are catered in high-volume shared facilities and do not guarantee the absence of airborne or contact traces. If your allergy is severe, pack shelf-stable, allergen-safe meals for the flight duration rather than relying solely on airline catering.
Step 4: Keep Itinerary and Safety Details Centralized
Managing multiple hotel confirmations, flight bookings, and medical emergency details across separate apps and paper folders can become chaotic when moving between cities. Storing emergency contacts, hospital coordinates, and travel documents alongside your trip dates keeps your key information unified.
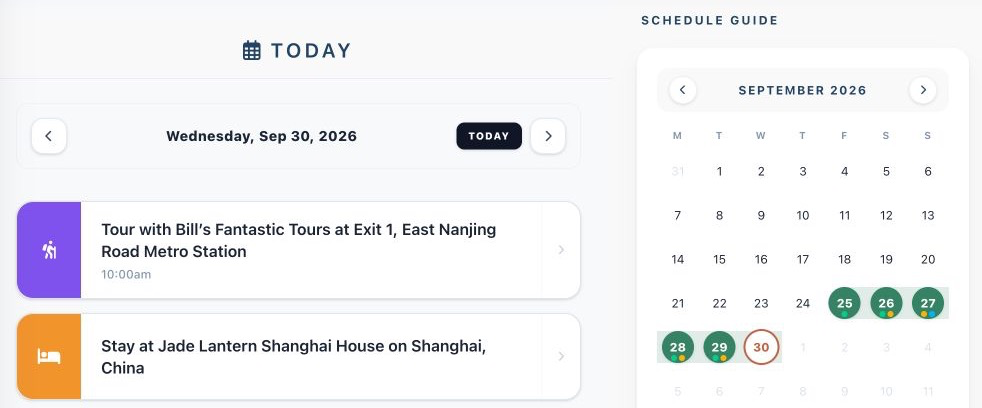
When organizing your travel reservations, you can use Suitcase2Go to keep your flights, accommodations, and daily schedule in one structured place. Centralizing your trip details makes it easy to confirm where you will be on any given day, review transit buffers, and coordinate logistics with traveling companions from a single screen.
| Preparation Step | Primary Action | Target Completion | Verification Check |
|---|---|---|---|
| Prescriptions & Doctor Note | Obtain 2+ auto-injectors per person; request formal travel letter | 4–6 weeks prior | Names on labels match passports exactly |
| Chef Translation Cards | Generate destination-specific cards via vetted templates | 2–3 weeks prior | Laminated; stored in 3+ separate bags |
| Security Planning | Review TSA / international liquid policies | 1 week prior | Devices accessible in carry-on bag |
| Local Emergency Dispatch | Identify target emergency numbers (e.g., 112 in EU, 119 in Japan) | 1 week prior | Saved in phone contacts and written on card backs |
Step 5: On-the-Ground Restaurant Verification Routine
When presenting your card to a waiter or host at your destination, apply a consistent three-phase communication protocol:

- The Host Filter: Show the translation card to the host or manager before being seated. Ask whether the kitchen can accommodate your restriction. If the host hesitates or seems dismissive, thank them and choose a different restaurant.
- The Kitchen Hand-Off: Once seated, hand your laminated card to the server. Request that they show the physical card directly to the kitchen chef or line manager rather than just taking verbal notes.
- Plate Arrival Confirmation: When the dish arrives at your table, confirm once more: "Is this plate prepared strictly without [Allergen]?" Inspect the dish visually before taking your first bite.
By combining verified translation cards, accessible medical paperwork, and a consistent dining verification routine, you can explore new destinations safely while keeping dietary risks under control.