
Booking an extended stay in a vacation home or serviced apartment offers significant comfort: more living space, laundry facilities, and a dedicated kitchen. Cooking your own meals can lower daily expenses and provide dietary control. Yet without a structured plan, self-catering trips often lead to overbuying, forgotten produce rotting in unknown refrigerator bins, and repeated convenience-store runs for basic seasonings.
Successfully managing a vacation rental kitchen requires treating it differently from your primary home. You are operating in an unfamiliar cooking environment with unknown cookware quality, unpredictable baseline supplies, and finite travel days. This guide walks through an end-to-end framework to audit your rental kitchen, stage grocery shopping, maintain food safety standards, and execute low-effort meal routines.

Step 1: Pre-Arrival Pantry Scoping and Host Inquiries
Before loading an online grocery cart or heading to the nearest supermarket on arrival day, clarify what the property actually provides.
While vacation rental guidance, such as Airbnb host standards for preparing spaces, encourages hosts to provide baseline cookware, dishware to match capacity, and "cooking basics" like cooking oil, salt, and pepper, inventory consistency varies widely. Many rental properties offer an assortment of mismatched cookware, while others strip pantries completely between guest turnovers.
- Contact the host 3–5 days prior to arrival: Ask whether the kitchen stocks basic cooking consumables (olive oil, salt, pepper, aluminum foil, coffee filters, paper towels) or if the property operates on a strict clear-out turnover policy.
- Confirm key appliances: Do not assume a rental includes an oven, dishwasher, blender, microwave, or baking sheet simply because a "full kitchen" is listed. Check the listing photos or message the owner if specific tools are central to your meal plans.
- Review agricultural restrictions: If you plan to travel with specialty spices, vacuum-sealed cured meats, or fresh produce from home, remember that transporting food across borders or between island territories is strictly regulated. The USDA APHIS agricultural travel guidelines mandate declaring all agricultural items at ports of entry to avoid fines or confiscation.
Step 2: Arrival Kitchen Audit (Before Buying Groceries)
Arriving hungry and immediately driving to a hypermarket is the most common self-catering mistake. Exhaustion leads to impulse purchases, oversized bulk packages, and perishable items that do not fit into the available storage space.
Take fifteen minutes upon check-in to perform a physical inventory of the kitchen:
- Check Cookware Condition: Inspect the frying pans. Non-stick coatings may be scratched, meaning you should plan cooking techniques that do not rely on fragile cookware.
- Identify Storage Solutions: Look for leftover storage containers, lids, foil, or resealable zip-top bags. If none exist, add reusable bags or a small roll of foil to your first shopping list.
- Inspect the Refrigerator and Freezer: Note internal volume and shelf spacing. Vacation rental refrigerators frequently suffer from poor circulation if overcrowded. The FDA refrigerator cold safety standards emphasize maintaining refrigerator temperatures at or below 40°F (4°C) and freezers at 0°F (-18°C), reminding cooks that overpacking shelves blocks critical airflow required to keep food cool.
- Audit Remaining Staples: Verify if previous guests or the host left unopened salt, sealed cooking oils, or tea bags. Check expiration dates before planning meals around existing pantry items.
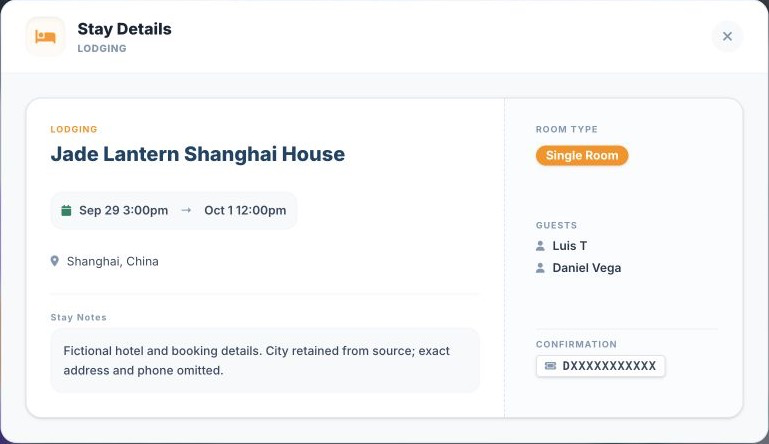
Keeping your check-in dates, rental addresses, and stay notes consolidated makes it straightforward to coordinate grocery deliveries, check-out dates, and kitchen planning. Explore how to organize trip logistics in one place at Suitcase2Go.
Step 3: Structuring the Staged Grocery Plan
Rather than executing one massive shopping trip meant to cover multiple weeks, divide your purchasing into three distinct phases: Day-1 Survival, Core Foundation, and Mid-Stay Refresh.
| Phase | Timing | Primary Purpose | Key Item Types |
|---|---|---|---|
| Phase 1: Arrival Survival | Arrival Evening | Low-effort dinner, immediate breakfast, coffee | Pre-made deli salad, pasta & jarred sauce, eggs, bread, coffee/tea, drinking water |
| Phase 2: Core Foundation | Morning of Day 2 | Staple proteins, shelf-stable carbs, cooking fats, multipurpose seasonings | Cooking oil, all-purpose seasoning blend, rice/grains, versatile proteins, hardy vegetables |
| Phase 3: Mid-Stay Refresh | Every 4–5 Days | Restocking fresh greens, delicate produce, dairy, single-use specialty ingredients | Leafy greens, berries, fresh seafood, herbs, sandwich lunch refills |
Phase 1: Arrival Survival (Night 1 & Morning 1)
Keep this shopping list minimal or acquire it from a nearby market within walking distance. Focus entirely on meals that require under 15 minutes of prep and minimal dishwashing. A box of high-quality pasta, jarred pesto, a loaf of crusty bread, fruit, and coffee ensures everyone is fed without complex cooking on your first night.
Phase 2: Core Foundation (Day 2 Forward)
Visit a major regional supermarket during off-peak morning hours on your first full day. Buy foundational pantry ingredients with high versatility. Rather than buying six individual spices that will be abandoned at departure, purchase one or two broad seasoning blends (such as an Italian herb mix, curry powder, or garlic-herb salt).
Phase 3: Rolling Mid-Stay Refreshes
Perishable produce and delicate proteins deteriorate quickly in unfamiliar rental appliances. Purchasing fresh ingredients every 3 to 5 days prevents food spoilage and allows your meal schedule to flex based on changing travel plans or unexpected restaurant visits.
Step 4: Rental Food Safety & Leftover Management
Rental kitchen setups require strict food safety discipline because you do not have commercial-grade chilling equipment or your own familiar storage systems.

Avoiding the Temperature Danger Zone
According to the USDA FSIS guidelines on the Danger Zone, perishable foods left between 40°F and 140°F enter a window where bacteria can multiply rapidly. Food should not sit at ambient room temperature for more than two hours—or one hour if ambient room or outdoor temperatures exceed 90°F (32°C). This applies directly when transporting groceries back to your rental on warm afternoons.
Refrigeration and Leftover Lifespans
Do not let large pots of cooked food sit on the stove to cool overnight before transferring them to the fridge. The USDA FSIS refrigeration safety standards clarify that hot foods can be placed directly into the refrigerator in shallow containers to speed chilling below 40°F. Observe standard storage timelines:
- Cooked meat and poultry leftovers: Eat within 3 to 4 days.
- Raw poultry and ground meats: Cook or freeze within 1 to 2 days of purchase.
- Cross-contamination prevention: Store raw meats on bottom shelves in leak-proof bags or plates to keep juices from contaminating fresh produce.
- Reheating: Reheat all leftovers thoroughly until steaming hot, reaching an internal temperature of 165°F.
Step 5: Designing a Low-Dishes Meal Rotation
No traveler wants to spend two hours scrubbing dishes in a rental without a high-capacity dishwasher. Build your meal routine around modular, low-prep concepts:
- Sheet-Pan & Skillet Meals: Roast cut vegetables and proteins together on a single foil-lined pan. This minimizes cleanup to one surface.
- Batch-and-Pivot Proteins: Grill or roast a double batch of chicken breast, tofu, or ground meat on Monday. Serve half in grain bowls the first night, and repurpose the remainder into tacos, wraps, or salad toppers 48 hours later.
- The "Assemble-Only" Lunch: Reserve complicated cooking for dinners or quiet mornings. Keep sandwich fixings, hard cheeses, nuts, cut fruit, and tinned fish readily accessible for rapid midday fueling between outings.
Step 6: The Exit-Plan Audit (Days Before Departure)
Three days before check-out, institute a grocery freeze. Cease buying new perishable items and conduct a "cupboard-clearing" meal cycle:

- Combine Stragglers: Turn remaining vegetables, eggs, and cheeses into an end-of-stay frittata, fried rice, or stir-fry.
- Check Donation Options: If you have unopened non-perishable canned goods, sealed pasta boxes, or unused condiments, ask your rental host if their cleaning crew redistributes food, or locate a nearby community food drop.
- Leave a Clean Foundation: Dispose of opened perishables from the refrigerator to avoid pest attraction and leave the refrigerator clean and accessible for the turnover team.
Organizing your long-stay meals around staged shopping, standard food storage temperatures, and modular recipes keeps self-catering enjoyable, economical, and free of food waste.